

Even furniture items or installations that are made from wood are still in great demand, since they are regarded as timeless classics. Over time, wood can lose its natural sheen. But don’t despair, it is possible to restore the brilliance to your old wood and refurbish that old wood; that’s where wood polishing enters the picture.
Simply put, wood polishing is a way of care and maintenance for your wooden installations or furniture pieces to help keep them in their healthy glow. Whether you have oak, teak, sheesham, acacia, or even furniture made of solid wood, a good polish brings out the look and ensures the durability of the furniture. Here in this guide, you will learn how to polish wood furniture, and some expert-recommended techniques to make the old furniture look new and fresh once again.
Table of Contents
How to Polish Wood Furniture
1. Setup and Prep Work
Use the most appropriate (permanent or temporary) wood polish. For simplicity, select any ordinary furniture or floor polish. They’ll be efficient and user-friendly polishes, so if all you want is a good shine, then you’ve got these polishes covered. For more interesting finishes, use linseed oil, tung oil, shellac, varnishes or lacquers.
If using some varnishes, lacquers, and oil-based mixtures, remember that they might produce toxic fumes and extra safety measures shall be required. If the new wood is modern without any “fancy” work put in and it looks and feels good, then you’re not obliged to polish it. Modern furniture and floors are supplied pre-polished and sealed. Wax should be used only on non-oil polishes, such as shellac or lacquer.
2. Repairing Any Damage or Imperfections
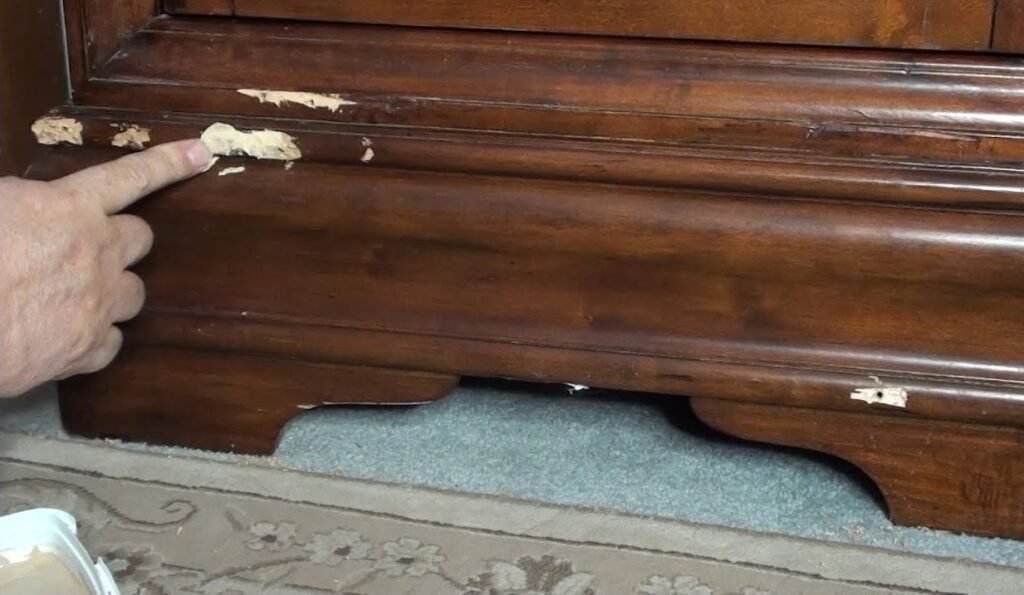
Inspect the wood and make sure it is free of cracks, dents, splits, gouges or other surface defects that impact the durability. For the most important of all, the area is cleaned to remove the dust, fibres, and the old finish, thus making the quality of the filling non-neglected. Select a proper wood filler according to wood type and desired finish. Using a putty knife, apply the filler material, pressing firmly to fill in in between hole spots and form it flush with the rest of the wood. Once put together, follow the manufacturer’s instructions on curing the filler, sanding of the repaired area using a progressive file grit until smooth and ready for staining/finishes.
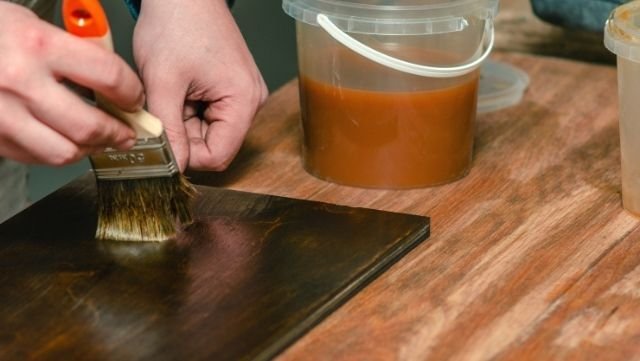
3. Choose the Right Wood Polish
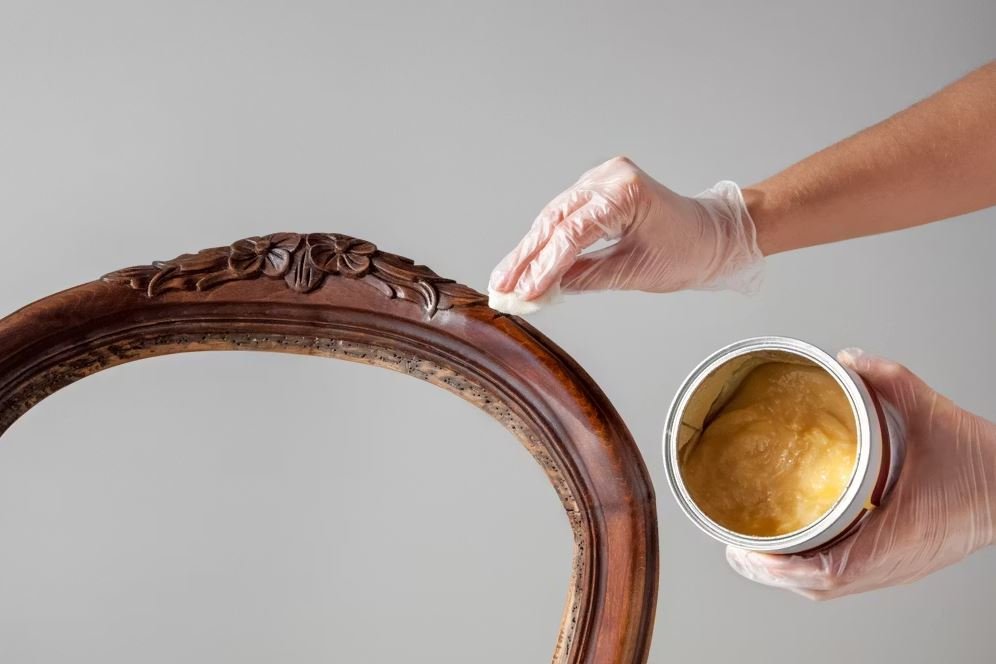
The use of the proper type of wood polish for a certain species and given finish of wood. Where chemistry is not wanted, a fatty natural oil such as linseed, tung, oat oil, mineral oil or others will go into the wood; they will enhance the grain and will contribute to the non-drying of the wood. Beeswax can be used to coat products that are added to and oil will provide a low-sheen surface, and make them more durable. Apply sparingly to an inconspicuous area, following the grain, with a soft cloth to test any product. Reapply frequently for re-protection and lustre.
4. Test the Polish First
Apply polish to an inconspicuous location first and then test on the rest of the top. A small trial patch is the one to test adverse reactions, before committing to a whole piece of fabric, where this may include discolouring of the fabric, dulling of the surface or damage to the finish. This is a basic measure to preserve the material and to get a desired appearance with the polish. If the test results reveal any negative aspects, halt use and look at another product or follow the manufacturer’s instructions to prevent a costly error.
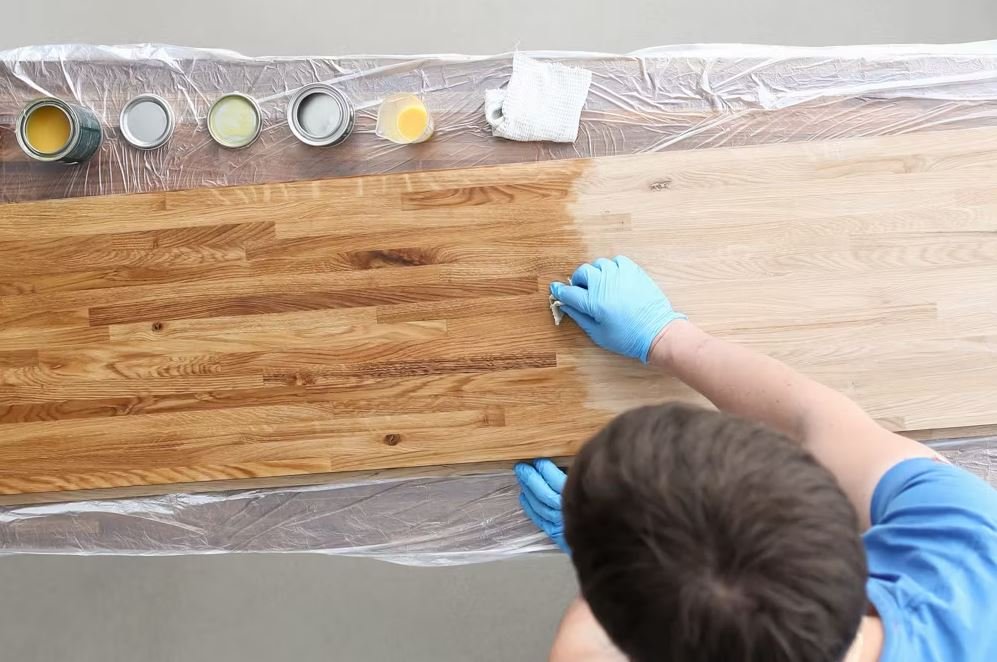
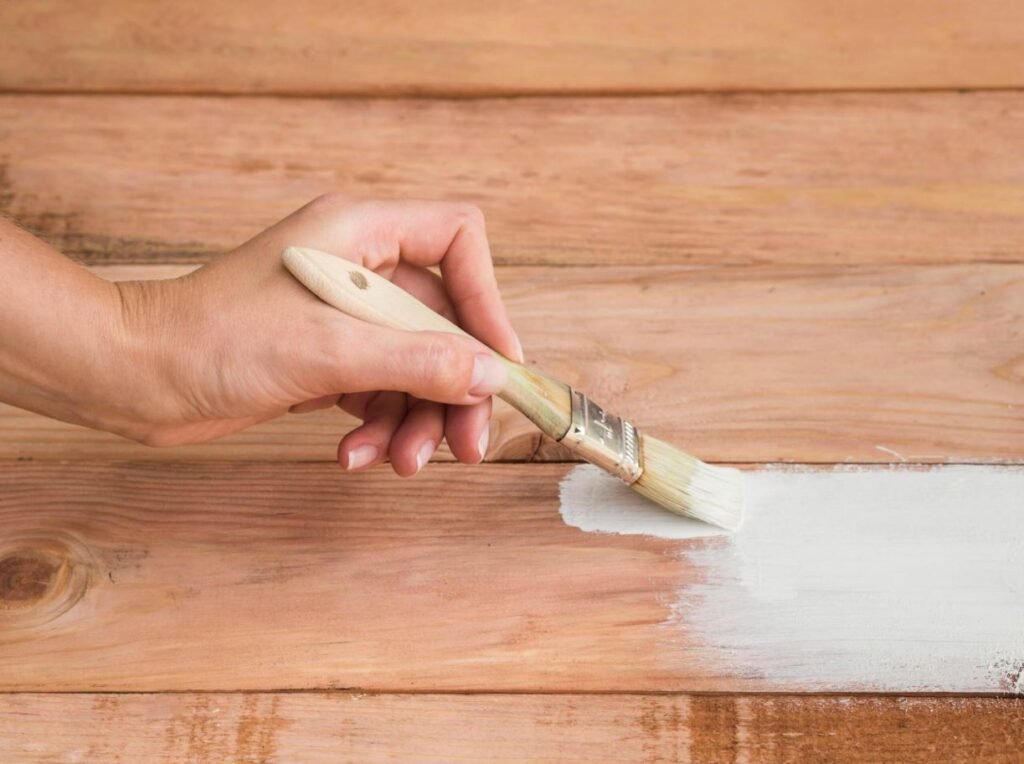
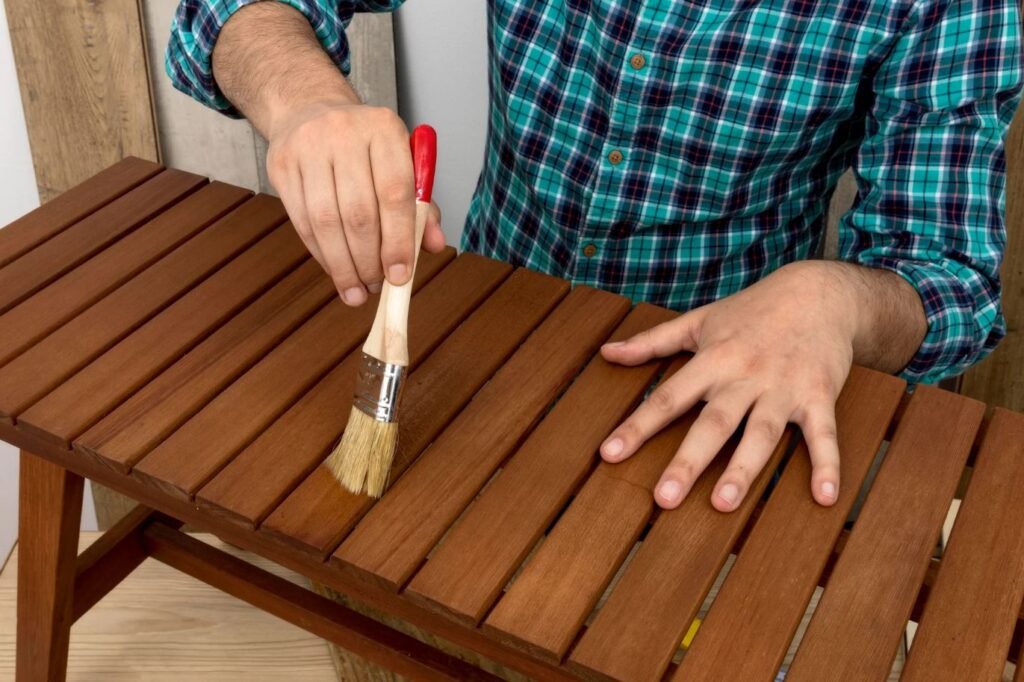
5. Apply the Polish Properly
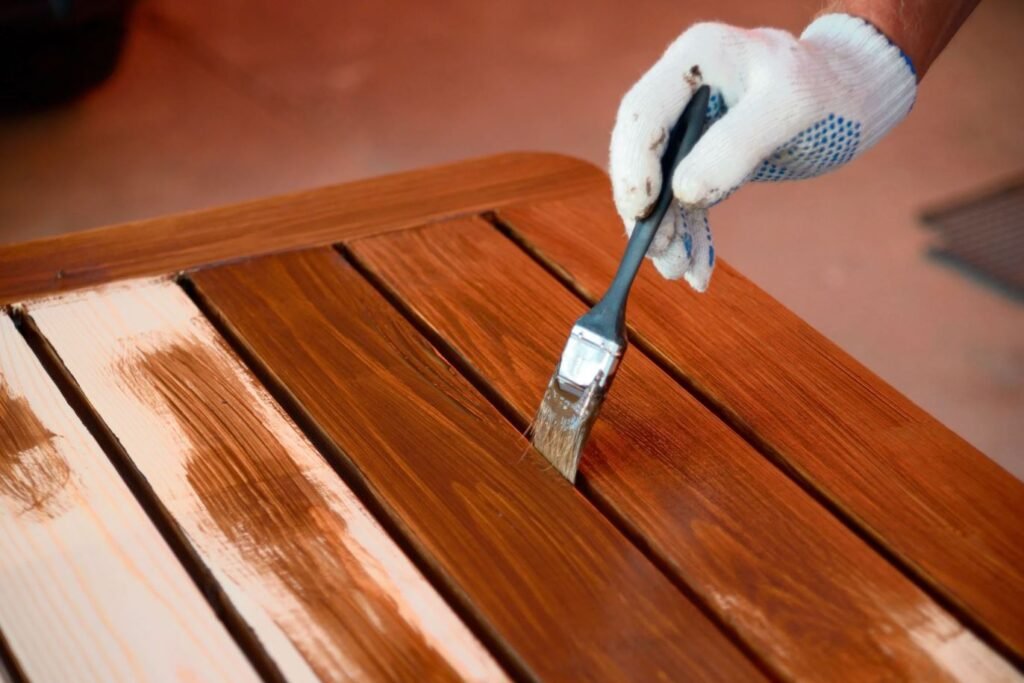
Using a small amount of wooden furniture polish and a soft cloth, apply and work in a light circular motion. One often made error is using too much product. Over-polishing can cause the wood grain to become clogged and cause dust and dirt to adhere over time. Minimize use and gently buffing – if needed! If possible, test in an inconspicuous place first and remove excess polish with a clean, dry cloth to ensure that the finish is smooth and dust-resistant.
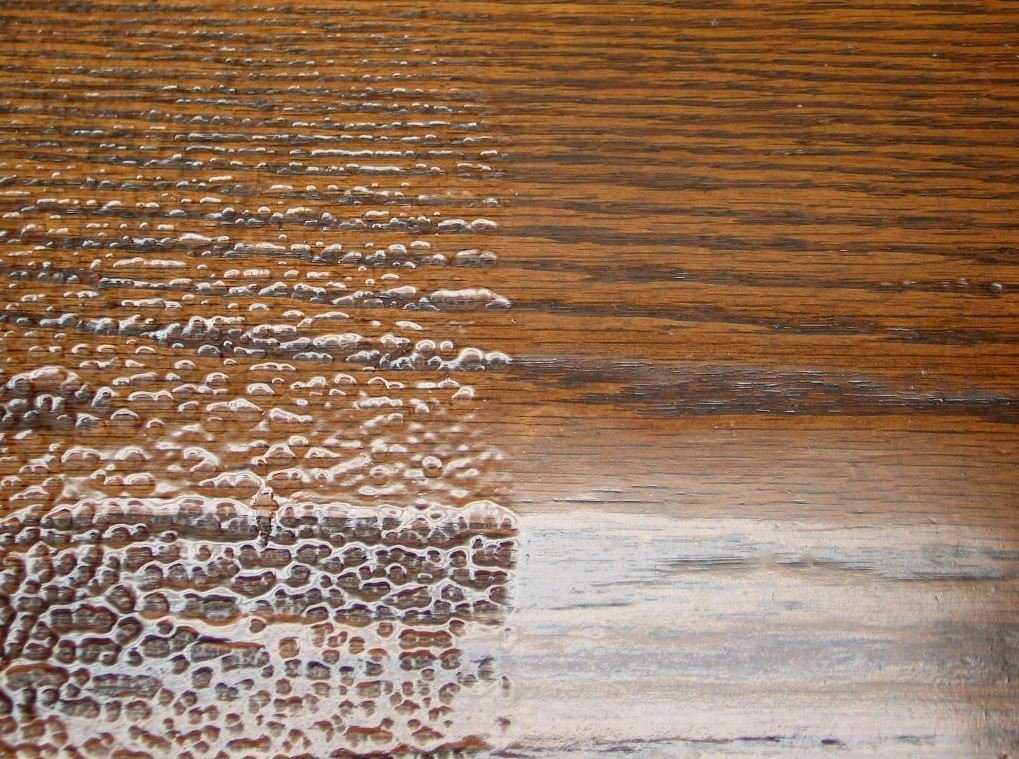
6. Let the Wood Absorb the Polish
Let the polish remain on the wood for some time to ensure the wood absorbs all the nourishing oils and protection afforded by the polish. Polishing treatments do not work the same on all hardwoods. An oil may not be absorbed as quickly as into dense woods as teak and sheesham, which have a close-grained structure; oak and willows or acacia have a more open grained and oil can therefore be absorbed more quickly. The polish will allow the time to penetrate the wood, replenish moisture, add shine, and add strength/longevity to the wood.
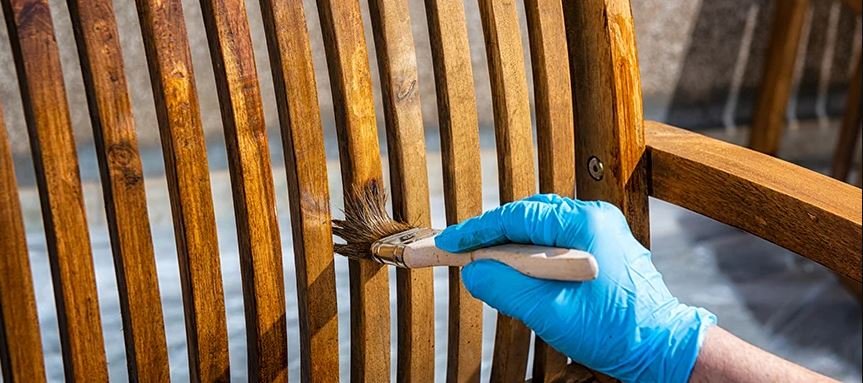
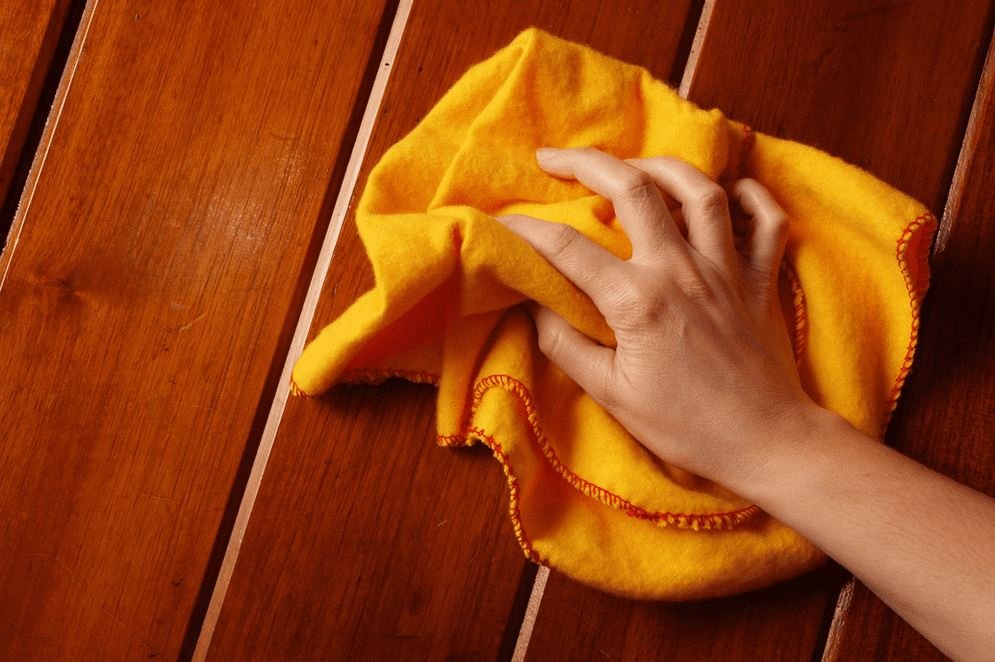
7. Buff the Surface

Using a clean, microfiber buffing cloth, gently buff the surface of the furniture in even circular motions until the furniture is rich and even gloss. Here, the unwanted residues are completely removed, and the wood grain is made more aesthetically pleasing. Every one of them looks better as a result of regular buffing that provides a protective finish, which extends the life of the furniture. For those willing to discover how furniture made of wood comes with a natural shine, this easy trick is among the simplest methods to get wood furniture to have a perfectly smooth and shiny look.
Best Furniture Polishes
1. Wax Polishes
Waxes (paste or liquids) produce a soft and low-shiny finish because they form a thin film on wood, which protects the wood surface. They act as a dust/light scratch barrier and condition, enhance the natural grain and colour, and are particularly recommended for hardwoods such as teak or mahogany. Waxes can be easily applied and buffed, and will provide a fill-in for the minor surface blemishes and small scratches. Select wax if you desire a natural, warm appearance and the occasional touch-up, but not heavy-duty protection.
2. Water-Based Wood Polish
Water-based polish gives a natural finish that will accent or maintain the original color and grain of wood and is particularly suitable for light-colored wood furniture. With low VOCs and low odorous emissions, it dries quickly without ever going yellow, maintaining the beauty of interiors over time. Easy to apply and easily cleaned with water, it is a convenient, friendly-for-the-environment option to apply to furniture and panelling in the house. It is able to maintain its look and protection through routine maintenance.
3. Surface Wood Polish
Cleaning and shining product, especially formulated to brighten up wood surfaces. Generally, a liquid or spray formulation that consists of oils, waxes, and cleaning agents. Surface polish is applied directly to the wood by means of demanding a cloth or sponge and then buffed with another cloth or sponge to impart a smooth, shiny appearance. Keeps the wood bright, and clears off dust, fingerprints and minor surface blemishes. It can provide a temporary luster and surface finish to furniture, cabinets, and other wooden items and can be used to regularly maintain them to keep them clean and shiny and in good condition.
4. Melamine Wood Polish
A closed-pore polish, meaning it makes the wood non-breathable and hence protected from cold and hot surfaces placed above it, melamine wood polish is great for usage in kitchens. Dries quickly after application. Be careful, however, with melamine wood polishes; these do not work very well in contact with water.
5. Silicone-Based Polishes
These provide a smooth, shiny surface and do not require any complicated applications, so they are great options for sealed or laminated furniture that immediately needs to be shiny. They can cause residue, though, which can cause issues if painting or treating again. Avoid using them for a surface that will be painted or finished at a later time and test on a small area before use to be sure they will not interfere with adhesion or finish.
6. Shellac Polish
The warm, glaring beauty that shellac brings to old furniture can accentuate both wood grain and natural furniture colors. A multi-purpose sealer and finish, it maintains the characteristic ‘antique’ appearance that is highly valued and will protect surfaces during the restorative process. Repairing shellac is easy (as is application) and it accentuates the character of classical items without obscuring their historical context. It is a smooth, slightly shiny surface that lends a lovely tactile, handcrafted quality to heirloom furniture and any interiors seeking a heritage finish.
How to Choose the Right Wood Polish
The right wood polish can drastically change the beauty, durability and life of your furniture. The proper finish keeps the surface intact and also enhances the all-natural features of wood and coincides with the wooden interior decor.
1. Understand the Furniture’s Needs
Determine if it is necessary to coat the wood with a strong finish for everyday use, or a nourishing polish that helps rejuvenate the rich and beautiful natural condition of the wood.
2. Identify the Existing Finish
Research whether the surface is bare wood, stained, painted or polished before; this will have an affect on how the new finish will absorb and look.
3. Select the Desired Finish Style
Choose the row that has the Desired Finish Style selected. A matte, satin, semi-brilliant, or brilliant finish can be used to increase the ambience and décor style of your space.
4. Consider Environmental Conditions
Take the UV, humidity, moisture and repeated use into consideration, as this will affect the durability and polish’s appearance.
5. Use the Correct Application Method
Never apply the product incorrectly; Apply the recommended technique (brush, spray, rub or buff) to give the best finish.
6. Allow Adequate Drying Time
Let the polish dry and cure well to ensure that the finish will enhance the vehicle and provide long-lasting protection and beauty.


