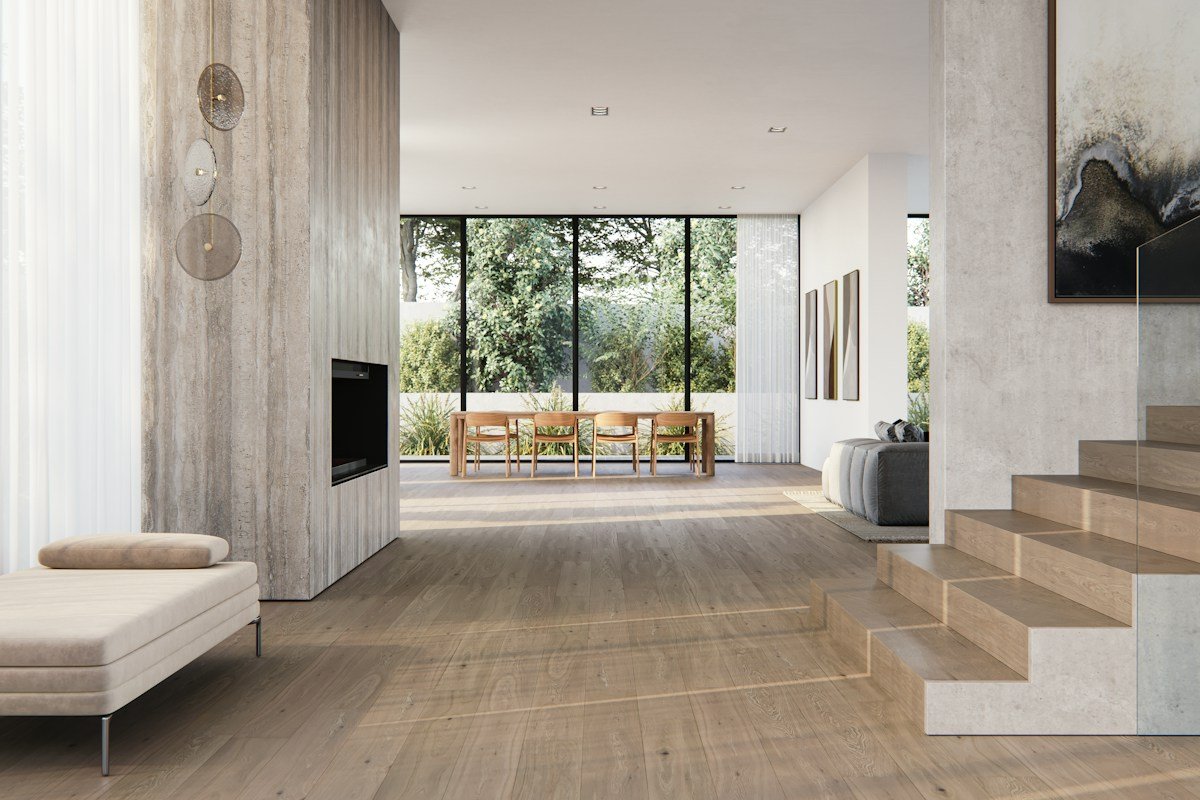
In the architectural evolution of contemporary residential design, few trends have altered spatial perception as dramatically as open-concept living. Great rooms that dissolve the physical boundaries between gourmet kitchens, expansive dining areas, sunlit foyers, and formal living salons demand flooring that can unify these sprawling volumes into a singular, cohesive aesthetic plane. While traditional flooring materials like twelve-inch ceramic squares or narrow timber strips fragment vast expanses with thousands of visual joints, large format porcelain floor tiles deliver an astonishing, uninterrupted monolithic elegance that transforms residential interiors into palatial architectural showcases.
Technically classified as any tile with at least one edge exceeding fifteen inches in length, large format porcelain has pushed far beyond standard boundaries. Today, residential installations routinely feature slabs measuring twenty-four by forty-eight inches, thirty-two by sixty-four inches, forty-eight by forty-eight inches, and extraordinary gauged porcelain tile panels (GPTP) stretching up to five by ten feet in a single unbroken sheet. By reducing visual grout lines by upwards of eighty to ninety percent, large format tiles create luminous, seamless surfaces that amplify ambient light, make modest floor plans appear cavernous, and evoke the timeless grandeur of continuous Italian marble slabs.
Yet behind this sublime visual minimalism lies an exacting structural reality. Large format porcelain is an uncompromising material that tolerates zero installation sloppiness. Traditional tile-setting methods that functioned adequately for small eight-inch tiles will guarantee catastrophic failures: cracked tiles, hollow voids, and sharp tripping hazards (lippage): when applied to large format slabs. A thirty-two-by-sixty-four-inch porcelain tile behaves as a rigid, unyielding architectural beam. Without microscopic substrate flatness, specialized non-slump polymer-modified mortars, mechanical leveling tensioners, crack-isolation uncoupling membranes, and calibrated thermal movement joints, the physical stresses of residential living will inevitably fracture the installation.
Executing an enduring large format tile installation requires grounding design and craftsmanship in certified industry engineering protocols. Synthesizing installation directives from the Tile Council of North America, professional distribution benchmarks from the Ceramic Tile Distributors Association, field installation standards from the National Tile Contractors Association, material testing criteria from the Materials and Methods Standards Association, and rigorous manufacturing performance metrics published by the American National Standards Institute, this definitive technical manual delivers an authoritative roadmap for planning, engineering, and installing large format porcelain flooring in high-traffic residential homes.
Anatomy of Large Format Porcelain: Sintered Compaction and Impermeability Physics
To appreciate why large format porcelain outperforms almost every other flooring surface in durability, one must understand the advanced materials science governing its production. Porcelain is not merely a fancy variety of ceramic tile; it is an entirely distinct category of vitrified sintered stone engineered through extreme thermal and mechanical forces.
The manufacturing journey begins with an ultra-refined slurry of raw inorganic minerals: fifty percent feldspar, white kaolin clay, quartz silica, and natural mineral color pigments. This refined mineral mixture is pulverized into microscopic particulate dust and subjected to immense compaction within hydraulic presses exerting over ten thousand metric tons of downward pressure. This crushing mechanical compression forces out microscopic air pockets, aligning mineral crystals into a dense, tightly packed matrix before firing.
Thermal vitrification takes place inside industrial roller kilns extending hundreds of feet in length. The compressed green tile slabs are fired at astronomical temperatures ranging between 1,200 and 1,250 degrees Celsius (2,200 to 2,300 degrees Fahrenheit). At these extreme temperatures, the feldspar minerals melt into a liquid glass state, flowing between the quartz and kaolin particles. As the tile cools, this glass phase recrystallizes, transforming the porous clay dust into an impenetrable, vitrified monolithic crystal lattice.
Water absorption ratings represent the defining physical benchmark of true porcelain. Under ASTM C373 laboratory testing protocols, a tile must exhibit an impervious water absorption rate of less than 0.5 percent by weight to be legally certified as porcelain. Premium large format porcelain routinely achieves water absorption rates below 0.05 percent: virtually zero absorption. This near-zero porosity makes large format porcelain completely impervious to water penetration, food oils, red wine spills, and cosmetic acids, while providing total freeze-thaw crack immunity for seamless indoor-to-outdoor patio transitions.
Mechanical flexural strength and breaking load are dictated by this crystalline density. Governed by ASTM C648 testing, standard ceramic tiles typically withstand three hundred to four hundred pounds of breaking force. Premium large format porcelain slabs exceeding nine millimeters in thickness routinely achieve breaking strengths surpassing one thousand to 1,500 pounds of force. This formidable load-bearing capacity allows large format porcelain to endure the rolling wheels of heavy kitchen appliances, pet claw friction, and concentrated commercial foot traffic without structural compromise.
Chemical stain resistance under ASTM C1378 ensures that common household contaminants cannot etch or discolor the surface. In standardized testing, vitrified porcelain surfaces are exposed to harsh staining agents including iodine, methylene blue, olive oil, and hot citric acids for twenty-four hours. Because porcelain lacks porous capillaries, these harsh agents are completely wiped clean using a damp microfiber cloth with zero residual ghosting, making porcelain vastly superior to natural marble or limestone, which etch and stain when exposed to lemon juice or wine.
Dimensional Scaling: Minimizing Grout Lines and Creating Monolithic Sightlines
The aesthetic power of large format porcelain floor tiles lies in the psychological phenomenon of spatial continuity. When human eyes scan a floor plane, the brain instinctively counts repetitive grid patterns formed by dark grout lines. A room tiled with standard twelve-by-twelve-inch squares contains over one hundred linear feet of grout gridlines for every one hundred square feet of living space, creating a visual cage that makes rooms feel compartmentalized, busy, and constrained.
Upscaling to large format formats transforms this visual geometry. Consider replacing twelve-inch tiles with thirty-two-by-sixty-four-inch porcelain slabs: the total footage of grout lines collapses by over seventy-five percent. Across a sixty-foot open-concept great room, the floor ceases to read as a fragmented mosaic of individual tiles; instead, it reads as a continuous, monolithic plane of solid architectural stone. Light reflecting across the floor encounters fewer grout depressions, producing sweeping specular reflections that bounce natural daylight deep into perimeter hallways and open kitchen zones.
Tile edge rectification is essential for achieving hairline grout joints. In traditional non-rectified (cushioned edge) ceramic tiles, firing in the kiln causes edges to warp slightly, requiring wide grout joints of three-sixteenths to one-quarter of an inch to absorb dimensional variations. Large format porcelain undergoes a mechanical rectification process after firing: precision diamond saws grind all four perimeter edges at an exact ninety-degree angle to micro-millimeter tolerances. These laser-straight rectified edges allow professional installers to specify ultra-narrow grout joints measuring just one-sixteenth to one-eighth of an inch.
Vein matching and continuous slab choreography elevate large format installations into museum-grade art. Advanced digital inkjet printing machines deposit micro-droplets of ceramic pigments deep into the tile surface prior to firing, replicating rare natural stones: such as Calacatta gold marble, Grigio Orobico, Nero Marquina, and vein-cut Roman travertine: with breathtaking botanical realism. Premium manufacturers produce porcelain slabs in synchronized sequence sets (labeled A, B, C, D) or mirror-image book-matched pairs. When laid across a grand foyer or open dining hall, the dramatic mineral veining flows seamlessly from plank to plank across dozens of feet, evoking the opulent quarry-cut stone floors of historic European cathedrals.
Subfloor Structural Rigidity: L/360 vs L/720 Deflection Tolerances
While the surface of large format porcelain is exceptionally hard and wear-resistant, its large physical footprint renders it uniquely vulnerable to structural deflection beneath the subfloor. A tiny half-inch tile can bridge minor subfloor dips without snapping; a forty-eight-inch porcelain slab subjected to upward or downward bending will fracture like glass along its centerline. Ensuring adequate subfloor stiffness is the non-negotiable prerequisite of any successful installation.
Deflection standards are governed by the American National Standards Institute under ANSI A108.02. For traditional ceramic tile installations, the standard structural deflection limit for floor joist systems is L/360: meaning the maximum allowable downward deflection under combined dead and live loads must not exceed the span of the joist (L) divided by 360 (or no more than one-half inch of deflection across a fifteen-foot span). However, for large format porcelain tiles and natural stone installations, TCNA and ANSI standards mandate a much more rigorous deflection limit of L/720: cutting allowable structural movement in half to no more than one-quarter inch across that same fifteen-foot span!
Evaluating existing timber floor joist framing requires inspecting joist dimensions, species, and span lengths. If two-by-ten or engineered I-joists spaced sixteen inches on center exceed spans of fourteen to sixteen feet, installing an additional layer of five-eighths-inch exterior-grade tongue-and-groove plywood over the existing subfloor is mandatory to eliminate joist deflection. Furthermore, solid timber blocking must be nailed between joists at mid-span to prevent joist twisting and lateral racking under moving family foot traffic.
Subfloor surface flatness tolerances are radically tighter for large format porcelain than for any other flooring category. Under TCNA Handbook guidelines, the substrate must be flat to within one-eighth of an inch over a ten-foot span (1/8″ in 10′) and no more than one-sixteenth of an inch over a two-foot span. Placing a ten-foot aluminum straightedge across the floor must reveal zero high ridges or low valleys exceeding the thickness of two credit cards. Any deviation beyond this tolerance will cause large tiles to rock like teeter-totters or bridge low spots, creating hollow pockets where point loads will crack the un-supported tile.
Remediating uneven subfloors requires grinding concrete high spots and applying self-leveling cementitious underlayments (such as Laticrete NXT Level or Mapei Ultraplan M20 Plus). On concrete slabs, diamond cup wheels mounted on HEPA-filtered floor grinders grind down humps. The floor is then primed with high-tack polymer primer and coated with a pourable self-leveling cementitious slurry, which flows outward under gravity to create a dead-flat, laser-smooth substrate perfectly prepared to receive large format porcelain.
Uncoupling Membranes and Crack Isolation Engineering
In residential construction, subfloors and tile finishes expand and contract at completely different rates. Concrete slabs undergo long-term shrinkage as moisture leaves the concrete mass, while hairline curing cracks inevitably form across the slab. If rigid porcelain tiles are mortared directly to concrete without an isolation layer, shrinkage cracks in the concrete will transfer directly upward through the mortar bed, telegraphing a matching jagged fracture line across your expensive porcelain slabs.
Uncoupling membranes (such as Schluter-DITRA, Laticrete STRATA_MAT, or Ardex UI 720) solve this vulnerability through shear decoupling physics. Manufactured from geometric polyethylene sheets featuring grid structures of square cavities anchored to an anchoring fleece webbing beneath, uncoupling membranes create a mechanical neutral layer between the subfloor and the tile.
The uncoupling mechanism allows independent in-plane movement between the subfloor and the porcelain. The fleece backing is solidly bonded to the subfloor with thin-set mortar, while the open geometric cavities on the upper face are filled with polymer mortar that locks the porcelain tiles securely in place. When the concrete subfloor moves or develops a hairline shrinkage crack, the flexible polyethylene geometric webbing allows the lower layer to shift laterally without transferring shear stress upward to the rigid tile above, permanently isolating the porcelain from crack damage.
Vapor management and moisture pressure equalization represent another critical function of uncoupling systems. In below-grade basements or on-grade concrete slabs, moisture vapor constantly rises from the soil. Solid mortar beds trap this vapor, creating hydrostatic pressure that can debond adhesives or cause efflorescence. Uncoupling membranes incorporate interconnected air channels beneath the tile cavities that permit moisture vapor to migrate harmlessly to perimeter expansion joints, equalizing vapor pressure and protecting the bond.
Mortar Engineering: ANSI A118.15 Medium-Bed Formulations and 95% Coverage Directives
Standard thin-set mortars formulated for traditional tiles are strictly prohibited when installing large format porcelain. Using basic thin-set will result in two catastrophic failures: the heavy weight of the large tile will squeeze the mortar out, causing the tile to slump unevenly into the substrate, or the mortar will shrink during hydration curing, pulling the tile edges out of plane and creating severe lippage.
Large and Heavy Tile (LHT) mortars: historically designated as medium-bed mortars: are specially formulated with coarse aggregate gradings, cellulose thickeners, and advanced polymers. Governed by ANSI A118.4 (modified) and ANSI A118.15 (improved modified) standards, LHT mortars can be applied in thick layers ranging from three-thirty-seconds of an inch up to a full one-half inch in cured thickness without slumping or shrinking. The heavy polymer cross-linking provides immense shear bond strength (often exceeding 400 to 500 psi), ensuring that the unyielding porcelain slab remains permanently fused to the substrate.
The ninety-five percent mortar coverage rule is an absolute industry mandate for large format porcelain installations in residential living areas (and one hundred percent in wet or exterior applications). In traditional small tile setting, eighty percent coverage with minor voids was often tolerated. With large format tiles, hollow voids beneath the slab represent catastrophic structural weak points. When a homeowner rolls a heavy refrigerator or steps heavily in high heels over a three-inch hollow void beneath a large porcelain tile, the un-supported porcelain will punch through and shatter.
Trowel notch geometry dictates mortar ridge collapse and air evacuation. Never use standard square-notch trowels for large format porcelain; square notches trap square air pockets that cannot escape when the tile is pressed down. Instead, specify large Euro-style slanted-ridge trowels or elliptical-ridge trowels (such as a 1/2″ x 1/2″ or 3/4″ x 9/16″ slant-notch trowel). Slanted ridges collapse predictably in a single direction under pressure, pushing trapped air outward through open perimeter joints and achieving complete, continuous void-free mortar contact.
Directional troweling and back-buttering choreography ensure total transfer. Trowel ridges must always be combed in straight, parallel lines perpendicular to the short side of the tile; never swirl trowel ridges in circular arcs or figure-eights, as swirling creates sealed air pockets that prevent ridge collapse. Simultaneously, every single large format tile must be back-buttered: applying a flat, thin skim coat of mortar across the entire back face of the tile using the flat edge of the steel trowel. This mechanical keying ensures that the mortar bonds aggressively to the dense, low-porosity back of the porcelain before the tile is bedded into the combed floor ridges.
Tamping and embedding mechanics require using a heavy rubber vibrating plate or a wooden beating block tapped firmly with a dead-blow mallet. After setting the slab onto the combed ridges, slide the tile back and forth across the floor by one-quarter inch perpendicular to the trowel ridges to collapse the mortar peaks, followed by systematically tapping across the entire surface. This mechanical agitation forces all residual air bubbles out through perimeter joints, achieving monolithic ninety-five-plus percent coverage.
Mechanical Lippage Tuning: Leveling Clips, Wedges, and Allowable Tolerances
Lippage represents the single greatest aesthetic flaw and physical tripping hazard in tile installations: the vertical height variation between the edge of one tile and the edge of its adjacent neighbor. In a room tiled with twenty-four-by-forty-eight-inch slabs, even a one-thirty-second-of-an-inch height difference creates a sharp, glaring edge that catches the toe, casts distracting shadows under low-angle sunlight, and chips under dragging furniture legs.
ANSI A108.02 establishes strict mathematical lippage tolerances for residential installations. For tiles with grout joints measuring one-sixteenth to one-eighth of an inch, the maximum allowable lippage is one-thirty-second of an inch (1/32″, or approximately 0.8 millimeters). Achieving this surgical precision across sixty-inch spans without mechanical assistance is virtually impossible, as even kiln-fired porcelain exhibits microscopic natural camber (a subtle crown in the center of the tile formed during high-temperature vitrification).
Mechanical tile leveling systems have revolutionized large format installation accuracy. These systems consist of heavy-duty nylon base clips inserted beneath tile edges into the wet mortar bed, paired with rigid plastic wedges or spinning threaded caps driven across the top joint using calibrated tensioning pliers. When the pliers compress the wedge against the clip, the mechanical clamping force pulls low tile edges up while pressing high tile edges down, locking both adjacent tile faces into a dead-flat horizontal plane while the mortar cures.
Spacers and clip distribution geometry must be calculated for large slabs. Leveling clips must be installed approximately two to three inches from each tile corner, with intermediate clips spaced every eight to twelve inches along the entire perimeter. For a thirty-two-by-sixty-four-inch tile, a minimum of eight to ten leveling clips are required per tile. Leave the mechanical clips clamped under tension for a full twenty-four hours until the LHT mortar has fully hydrated and cured, after which the clips are cleanly kicked or mallet-struck parallel to the joint, snapping off cleanly below the tile face beneath the grout line.
Offset pattern restrictions prevent compounding natural tile warpage. When installing rectangular tiles (such as 12×24″ or 24×48″), homeowners often request a traditional fifty percent brick-stagger (half-lap) pattern. However, because all large format tiles possess minor upward camber in their center, a 50% offset places the highest point of one tile (its center) directly adjacent to the lowest point of its neighbor (the corner), creating unavoidable, severe lippage. TCNA guidelines mandate that large format rectangular tiles be installed in a third-lap (33% maximum offset) or a stacked grid alignment, preserving flat surface transitions.
Movement Accommodation: TCNA EJ171 Expansion Joint Architecture
One of the most catastrophic, explosive failures in residential flooring is tile tenting: where an entire floor of large format porcelain suddenly buckles upward into a triangular ridge with a loud pop, cracking tiles and separating from the concrete slab. This dramatic failure occurs when installers fail to incorporate movement accommodation joints, ignoring the basic physics of thermal expansion and building settlement.
All building materials expand and contract in response to temperature fluctuations and structural movement. Concrete slabs expand thermally and shrink as concrete moisture cures; timber framing swells with seasonal humidity; and porcelain tiles expand when heated by sunlight or radiant heating cables. If large format tiles are grouted tightly against drywall, baseboards, and door jambs with rigid cementitious grout, the expanding tiles have nowhere to go. Lateral compressive stresses build up across the floor until the compressive force exceeds the shear bond strength of the mortar, violently popping the tiles off the floor.
TCNA Method EJ171 governs the design and placement of movement accommodation joints in all tile installations. Perimeter expansion joints are mandatory around every perimeter wall, column, kitchen island, and vertical architectural obstruction. A continuous open gap of one-quarter inch must be maintained around the entire room perimeter. This gap must never be filled with hard mortar or cementitious grout; it must remain completely open, concealed beneath baseboard moldings, or filled with a flexible 100% silicone or polyurethane architectural sealant.
Interior field expansion joints must be incorporated across large open-concept spaces. For interior residential installations not exposed to direct sunlight, TCNA guidelines require a flexible movement joint every twenty to twenty-five feet in each direction. In rooms bathed in intense direct sunlight: such as great rooms with south-facing floor-to-ceiling glass walls or solariums: movement joints must be spaced every twelve to sixteen feet. These movement joints replace standard rigid grout with color-matched 100% silicone sealant meeting ASTM C920 Class 25 standards, flexing elastically to absorb thousands of thermal expansion cycles over the lifetime of the home.
Radiant Hydronic Underfloor Heating Systems Under Large Porcelain
Porcelain tile represents the single most efficient, responsive flooring surface available for radiant underfloor heating. While timber and vinyl possess natural insulating properties that resist thermal conduction, porcelain is a dense mineral stone that acts as a magnificent thermal conductor, absorbing heat rapidly from embedded hydronic tubes or electric heating cables and radiating warm, gentle infrared comfort into living spaces.
Thermal conductivity values highlight this heating efficiency. Porcelain boasts a high thermal conductivity rating of approximately 1.3 to 1.5 Watts per meter-Kelvin (W/mK), compared to barely 0.15 W/mK for engineered hardwood and 0.20 W/mK for vinyl plank. This high conductivity allows radiant floor systems beneath porcelain to heat rooms faster while operating at lower boiler water temperatures, lowering monthly energy consumption while delivering luxurious comfort under bare feet on cold winter mornings.
Ramping protocols during startup prevent thermal shock to curing mortar beds. Never turn on a radiant heating system immediately after tiling; activating heat while mortar or grout is curing accelerates water evaporation, preventing proper cement hydration and leaving mortars brittle and powdery. Wait a minimum of fourteen to twenty-one days after grouting before activating the heating system. When turning on the heat, begin at ambient temperature and increase water temperature by no more than five degrees Fahrenheit per day until reaching desired operating comfort, allowing the tile assembly to expand gradually without stress.
Slip Resistance and Friction Dynamics: Deciphering ANSI A326.3 DCOF Standards
In high-traffic open-concept residences where porcelain flooring flows seamlessly from front entry foyers into busy family kitchens and dining halls, slip-and-fall safety represents a critical architectural concern. Wet kitchen spills, wet dog paws, and rain tracked in from exterior doorways can transform polished stone into a slick hazard if slip resistance is not properly engineered.
The historical standard for measuring tile slip resistance was the Static Coefficient of Friction (SCOF) under ASTM C1028. However, SCOF only measured the force required to start moving on a stationary surface, proving unreliable for predicting slip resistance while walking. In 2014, the Tile Council of North America and ANSI established the Dynamic Coefficient of Friction (DCOF) using the automated BOT-3000E digital tribometer under ANSI A326.3 standards. DCOF measures friction while an object is already in motion across a wet surface lubricated with slightly soapy water (0.05% sodium lauryl sulfate solution).
ANSI A326.3 establishes clear threshold benchmarks for interior residential spaces. For level interior floors expected to be walked upon when wet: such as kitchens, entry foyers, laundry rooms, and dining zones: the wet DCOF rating must be 0.42 or greater. Porcelain tiles achieving a wet DCOF of 0.42 or higher provide certified slip resistance that actively protects children, elderly family members, and guests from dangerous accidental slips.
Surface finish treatments dictate both aesthetic reflectivity and tactile slip resistance. Polished porcelain provides a breathtaking, mirror-like specular reflection that exudes luxury, but typically yields a wet DCOF between 0.30 and 0.38: making it ideal for dry formal living rooms and grand entry halls, but requiring caution in wet kitchen work zones. Matte, honed, and textured finishes incorporate microscopic surface micro-grooves that deliver wet DCOF ratings ranging from 0.45 to 0.65, combining sleek contemporary sophistication with robust slip defense.
Precision Fabrication: Diamond Wet-Coring, Bridge Sawing, and Suction Handling
Working with sixty-inch large format porcelain demands a specialized arsenal of fabrication tools. Traditional tile snips, cheap handheld diamond grinders, and manual squeeze cutters that worked for small bathroom tiles will shatter expensive large format slabs within seconds.
Handling and transporting large porcelain slabs requires heavy-duty vacuum suction cup rail systems. A single thirty-two-by-sixty-four-inch porcelain tile weighs between forty-five and sixty pounds; picking up a slab by its ends causes the center to sag under its own weight, creating internal tensile stress that can snap the tile before it ever reaches the mortar bed. Professional installers use aluminum transport frames equipped with four to six continuous vacuum suction cups, allowing two installers to lift, transport, and back-butter the tile with zero flexing or risk of edge chipping.
Linear cutting requires commercial rail-guided scoring and snapping systems or sliding bridge wet saws. Rail cutters (such as the Montolit Flash Line or Rubi Slim Cutter) clamp directly onto the tile face using suction cups. A precision tungsten carbide or diamond scoring wheel is glided firmly across the porcelain glaze in a single, smooth pass, scoring a continuous micro-fracture line. Specialized compound breaking pliers then apply gentle, controlled leverage at both ends of the score line, snapping the tile with laser-straight factory perfection.
Drilling plumbing penetrations, toilet flanges, and floor electrical outlets requires diamond-core hole saws running with continuous water cooling. Porcelain’s extreme hardness (rating seven to eight on the Mohs mineral hardness scale, rivaling topaz and quartz) will melt dry carbide drill bits within three seconds. Professional fabricators use electroplated diamond core bits chucked into variable-speed drills, operating at 1,500 to 2,000 RPM while spraying cool water continuously over the cutting zone to prevent thermal shock fractures.
Advanced Grout Technologies: Epoxy vs Pre-Mixed Urethane vs High-Performance Cementitious
While large format installations minimize grout joints, the remaining joints must withstand aggressive foot traffic, dirty mop water, cooking grease splatters, and food spills without discoloring or harboring bacteria. Grout chemistry dictates long-term maintenance simplicity.
Traditional sanded cementitious grout (governed by ANSI A118.6) represents a dated technology that should be avoided in modern large format installations. Standard cement grout is porous, absorbent, and prone to efflorescence (chalky white salt blooms leaching out of curing cement). It requires continuous chemical sealing every six to twelve months and easily stains from coffee, red wine, and dirty cleaning water.
High-performance polymer-modified cementitious grouts (ANSI A118.7) provide a significant upgrade for residential living areas. Products like Mapei Ultracolor Plus FA or Laticrete Permacolor Select utilize calcium aluminate cement chemistries and fine aggregate grading. They cure rapidly, resist efflorescence completely, and incorporate built-in water-repellent polymers that block topical liquid absorption without requiring annual liquid sealers.
Epoxy and single-component pre-mixed resin grouts represent the ultimate gold standard of stain impermeability. 100% solids epoxy grout (ANSI A118.3) consists of epoxy resin, hardener, and color-coated silica quartz crystals. Epoxy grout cures into an impermeable, non-porous solid plastic bond that is 100% waterproof, chemical-resistant, and stain-proof. It never requires sealing, will never crack from footstep vibrations, and can be scrubbed clean with boiling water and disinfectant without fading or eroding over decades.
Porcelain Tile Formats and Installation Systems Comparison
Selecting the optimal tile format and installation engineering profile requires balancing visual drama, subfloor preparation complexity, specialized tool requirements, and total installed budget. Sprawling executive living rooms benefit from massive thirty-two-by-sixty-four-inch slabs, whereas high-traffic family foyers and kitchens may prioritize textured slip resistance and rapid mechanical leveling.
Evaluating tile specifications against certified TCNA performance benchmarks ensures that your structural investment delivers decades of flawless beauty, zero hollow voids, and effortless maintenance.
The comparative matrix below evaluates the dimensions, grout line reduction percentages, required subfloor deflection ratings, mortar specifications, and ideal application zones for the six primary porcelain tile formats specified in modern residential architecture.
| Porcelain Format Architecture | Grout Reduction vs 12″ Tile | Subfloor Deflection Mandate | Required Mortar Classification | Leveling System Requirement | Ideal Application Zone |
|---|---|---|---|---|---|
| Large Format Plank (24″ x 48″) | 75% Grout Reduction | L/360 Timber / Rigid Concrete | ANSI A118.4 / A118.15 LHT Mortar | Mandatory (Wedge & clip system) | Kitchens, open dining rooms, master suites |
| Monumental Slab (32″ x 64″) | 82% Grout Reduction | L/480 to L/720 Mandatory | ANSI A118.15 Polymer LHT Mortar | Mandatory (10 clips per tile minimum) | Grand living halls, open-concept great rooms |
| Square Monumental (48″ x 48″) | 75% Grout Reduction | L/720 Deflection Benchmark | ANSI A118.15 Improved LHT | Mandatory (Suction frame handling) | Modern geometric foyers, minimalist salons |
| Gauged Porcelain Panels (5′ x 10′) | 92% Grout Reduction (Monolithic) | L/720 + Dead-Flat Self-Leveling | ANSI A118.15 Specialty GPTP Mortar | Specialized mechanical crane / frame | Luxury architectural estates, feature living planes |
| Textured Outdoor/Indoor (24″ x 24″) | 50% Grout Reduction | L/360 Timber / Concrete Patio | ANSI A118.4 Standard Modified | Recommended (Wedge clips) | Entry foyers, covered patio transitions, mudrooms |
| Traditional Ceramic (12″ x 12″) | 0% Benchmark (Fragmented) | L/360 Standard Allowance | ANSI A118.1 Unmodified / Basic Thin-Set | Manual finger spacing (Obsolete) | Legacy budget bathrooms, small utility closets |
Reviewing these performance benchmarks reinforces why large format porcelain has captured modern luxury architecture. By matching advanced mortar chemistry to rigorous subfloor preparation, your flooring delivers an enduring, monolithic architectural foundation that elevates your entire residence.
Frequently Asked Questions About Large Format Porcelain Floor Tiles
What is considered a large format tile in residential construction?
According to the Tile Council of North America (TCNA) and ANSI standards, any tile with at least one edge measuring fifteen inches or greater is classified as a large format tile. Common residential formats include 12×24, 24×48, 32×64, and 48×48 inches, as well as oversized gauged porcelain panels measuring up to five by ten feet.
Can large format porcelain tiles crack easily if someone drops a heavy object?
When installed correctly with ninety-five percent mortar coverage and zero hollow voids beneath the slab, large format porcelain is virtually indestructible. Because porcelain is fired at over 1,200 degrees Celsius and vitrified into dense crystalline stone, it withstands extreme impact. However, if an installer leaves hollow voids beneath the tile, dropped objects can fracture the un-supported glass-like plane.
Why do large format tiles require special mortar instead of standard thin-set?
Large format tiles are heavy and cover broad surface areas, which causes them to sink and slump into standard wet thin-set, creating severe lippage. Large and Heavy Tile (LHT) mortars are engineered with coarse aggregates and anti-slump polymers that support heavy tile weight without shrinking as the mortar cures, maintaining a dead-level plane.
What is tile lippage and how is it prevented?
Lippage is the height variation between the edges of adjacent installed tiles. It creates sharp tripping edges and unsightly shadows. Lippage is prevented by pouring self-leveling underlayment to achieve a substrate flat within one-eighth inch over ten feet, using mechanical leveling clips and wedges, and avoiding 50% brick-stagger offsets that accentuate natural tile crown.
Are polished large format porcelain tiles slippery when wet?
Polished porcelain features a mirror-like finish that can be slick when wet, typically exhibiting an ANSI A326.3 Dynamic Coefficient of Friction (DCOF) below 0.40. For wet-prone areas like kitchens, foyers, and laundry rooms, specifying matte, honed, or textured porcelain with a wet DCOF rating of 0.42 or higher ensures certified slip safety.
What are rectified tiles and why are they necessary for large format flooring?
Rectified tiles are mechanically cut and ground with diamond saws after kiln firing, producing perfectly square ninety-degree edges with millimeter precision. Rectification allows installers to specify ultra-thin grout joints measuring one-sixteenth to one-eighth of an inch, creating seamless monolithic sightlines.
How do expansion joints prevent large format tiles from tenting and buckling?
All residential buildings experience thermal expansion and structural movement. If tiles are grouted tightly against walls without movement joints, thermal expansion causes lateral compression that buckles tiles off the slab (tenting). Leaving one-quarter-inch perimeter expansion joints and interior silicone soft joints every twenty feet allows the floor to breathe without cracking.
Which grout is best for large format porcelain floor tiles?
High-performance polymer-modified cementitious grouts (ANSI A118.7) or 100% solids epoxy grouts (ANSI A118.3) represent the best choices. Epoxy and advanced grouts are completely non-porous, highly stain-resistant, never require chemical sealing, and resist dirty mop water discoloration across decades of high-traffic use.
Can large format porcelain tiles be installed over existing hardwood or vinyl?
No, large format porcelain must never be installed directly over existing hardwood or floating vinyl. Timber boards expand and flex, and vinyl compresses under point loading, both of which will crack rigid porcelain slabs. Existing flooring must be stripped down to the subfloor, followed by pouring self-leveling underlayment or installing an uncoupling membrane before tiling.
How do you clean and maintain large format porcelain floor tiles?
Because porcelain possesses near-zero water absorption (less than 0.05%), maintenance is remarkably simple. Sweep or vacuum regularly with soft brush attachments, and mop with warm water mixed with a pH-neutral cleaner. Avoid oil-based waxes or sealers, which leave sticky surface residues that attract dust and dull the natural porcelain luster.
Architectural Verdict and Modern Open-Concept Spatial Elegance
Large format porcelain floor tiles represent the ultimate synthesis of modern materials science and visionary residential architecture. By dissolving visual boundaries, minimizing maintenance-intensive grout lines, and providing impenetrable defense against daily family living, large format porcelain elevates open-concept residences into serene, light-filled sanctuaries of enduring beauty.
Achieving this architectural perfection requires honoring the structural discipline of the material: ensure joist deflection meets stringent L/720 criteria, flatten substrates with self-leveling compounds to one-eighth-inch tolerances, specify ANSI A118.15 non-slump polymer mortars with ninety-five percent coverage, lock joints with mechanical leveling wedges, and protect open expanses with calibrated silicone movement joints.
When engineered with uncompromising precision, a large format porcelain floor is not merely a floor covering; it is a permanent architectural foundation: a breathtaking, monolithic plane of stone-like elegance that grounds your home in modern luxury for generations to come.