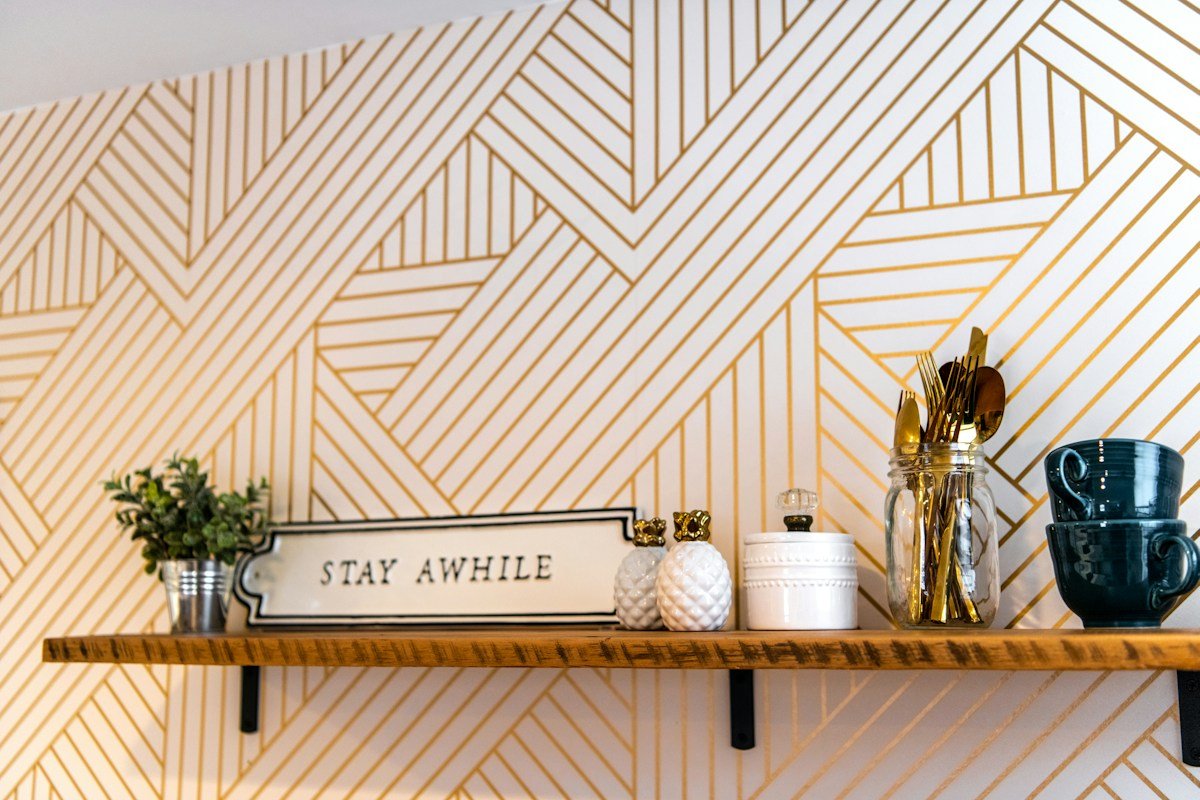
Blank vertical walls represent the greatest untapped design canvas in modern residential architecture. Whether confronting an uninspired drywall expanse in a modern kitchen, a barren corridor alcove, or an empty vertical plane above a living room sofa, bare walls frequently leave interior spaces feeling cold, unfinished, and devoid of personality. Handcrafted solid timber floating shelves offer an extraordinary architectural solution: delivering the warmth and tactile grain of organic hardwoods while maintaining an airy, minimalist silhouette completely free of visible corbels or bulky mounting brackets.
The visual magic of a floating shelf lies in its apparent defiance of gravitational physics. A thick slab of solid white oak, black walnut, or Douglas fir appears to levitate effortlessly against the drywall, supporting stacks of ceramic stoneware, curated art books, and trailing botanicals with clean grace. Yet beneath this tranquil surface lies a demanding structural reality. Unlike traditional shelving supported by triangular metal brackets mounted beneath the shelf deck, a floating shelf operates as an uncompromising mechanical cantilever. Every pound of weight placed upon its outer lip exerts tremendous rotational leverage against internal mounting hardware concealed deep within the wall cavity.
Far too many DIY enthusiasts experience catastrophic shelf failures: sagging timber lips, torn drywall paper, stripped plastic anchors, and fractured stoneware crashing to the floor in the middle of the night. These frustrating mishaps occur because amateur installations attempt to treat floating shelves as decorative art frames, relying on flimsy plastic drywall anchors or hollow hollow-core box construction. Engineering a durable floating shelf requires treating the installation as a serious structural joinery project that honors wood moisture movement, cantilever bending moments, stud shear strengths, and precision steel boring tolerances.
Executing an heirloom-grade installation demands grounding your craftsmanship in certified structural and material standards. Drawing upon lumber grading and sustainable harvesting protocols from the Forest Stewardship Council, jobsite safety directives from the Occupational Safety and Health Administration, residential wall framing codes curated by the National Association of Home Builders, empirical mechanical property data from The Wood Database, and cantilever engineering principles published by the Structural Engineers Association, this guide delivers an uncompromising blueprint for designing, crafting, and anchoring floating wooden shelves that will remain dead-level and rock-solid for decades.
Lumber Selection and Equilibrium Moisture Dynamics
The structural longevity and aesthetic grace of any floating shelf begin long before a drill bit touches the wall. Selecting the appropriate lumber species and verifying moisture stability forms the foundational prerequisite of a successful build. Homeowners who purchase construction-grade two-by-ten spruce or pine from big-box home improvement stores frequently discover that their shelves warp into corkscrews within sixty days of installation. Framing lumber is intentionally milled with moisture content between fifteen and nineteen percent; when introduced into an air-conditioned or heated residential living environment where relative humidity hovers around forty percent, the wood rapidly dries out, triggering severe cupping, twisting, and bowing.
Kiln-dried furniture-grade hardwoods represent the premier choice for handcrafted floating shelves. Domestic hardwoods: such as American white oak (Quercus alba), black walnut (Juglans nigra), hard sugar maple (Acer saccharum), and white ash (Fraxinus americana): offer dense cellular structures, remarkable bending strengths, and captivating grain patterns. Kiln-dried hardwoods are processed to an equilibrium moisture content (EMC) of six to eight percent, matching the indoor ambient conditions of modern climate-controlled homes. This thermal conditioning ensures that the shelf retains its flat, true geometry across shifting seasonal humidity cycles.
Grain orientation significantly impacts dimensional stability and load-bearing performance. Lumber is commercially sawn in three primary orientations: plainsawn (flat-sawn), quartersawn, and riftsawn. Plainsawn boards display cathedral grain arches across their faces but exhibit the highest degree of tangential shrinkage and potential cupping. Quartersawn and riftsawn timbers feature vertical growth rings oriented between forty-five and ninety degrees relative to the face of the board. This vertical grain orientation delivers extraordinary stability: radial shrinkage is approximately half that of tangential shrinkage: making quartersawn white oak or riftsawn ash virtually immune to cup deformation across its width.
Evaluating wood hardness through the standardized Janka scale provides practical insight into durability and dent resistance. The Janka hardness test measures the force in pounds required to embed a 0.444-inch steel ball halfway into the wood fiber. Hard maple boasts a formidable Janka rating of 1,450 lbf, white oak clocks in at 1,360 lbf, and black walnut provides a resilient 1,010 lbf. While softer species like Douglas fir (660 lbf) or Eastern white pine (380 lbf) can be utilized for rustic aesthetics, dense hardwoods prevent surface gouging from ceramic mug bottoms, metal bookends, and decorative cookware.
Live-edge timber slabs introduce organic, sculptural drama into contemporary interiors. When working with natural live-edge slabs, preserving the natural undulating cambium layer requires meticulous preparation. All exterior tree bark must be completely stripped using a curved drawknife and hand chisels; leaving bark attached invites fungal decay and beetle larvae over time, while natural bark inevitably sloughs off under dry indoor conditions. Once stripped, wire-brushing the underlying sapwood reveals silky, organic contours that celebrate the authentic anatomy of the tree.
Cantilever Mechanics: Bending Moments and Structural Leverage
To construct a floating shelf that will never sag under heavy kitchen stoneware or extensive book collections, you must understand the basic laws of cantilever physics. A floating shelf is a beam anchored at only one end, with the entire load suspended outward into free space. This configuration subjects the internal mounting hardware and wall studs to intense bending moments and rotational leverage.
The fundamental equation governing cantilever mechanics is Moment equals Force multiplied by Distance (M = F * d). The downward gravitational force exerted by items sitting on the shelf does not simply push downward; it acts as a lever arm pivoting around the bottom front edge of the wall connection. For example, a ten-pound cast iron Dutch oven placed at the front edge of a twelve-inch-deep shelf generates a rotational bending moment of one hundred and twenty inch-pounds. If that same ten-pound load is placed on an eighteen-inch-deep shelf, the rotational moment surges to one hundred and eighty inch-pounds: a fifty percent increase in mechanical leverage against the internal mounting rod and wall fasteners.
This rotational leverage creates two simultaneous structural stresses within the wall assembly: tensile pullout stress at the top fastener, and compressive crushing stress at the bottom contact line. The top mounting screws securing the concealed steel bracket are subjected to continuous outward tension, attempting to rip the screws straight out of the wooden wall stud. Meanwhile, the bottom edge of the bracket pushes inward against the drywall, threatening to crush the gypsum core. If the bracket backplate is too short in vertical height, or if the fasteners lack sufficient thread engagement into solid framing lumber, the assembly will pivot forward, producing an unsightly and dangerous downward sag.
Dimensional thickness of the shelf timber directly governs its structural stiffness and resistance to deflection. The stiffness of a rectangular wooden beam is governed by its Moment of Inertia (I = b * h^3 / 12), where b represents the shelf width and h represents the vertical thickness. Notice that thickness (h) is raised to the third power. Doubling the vertical thickness of a wooden shelf increases its resistance to bending by a factor of eight! A shelf milled to a robust thickness of two inches or two-and-a-half inches exhibits virtually zero perceptible deflection across its span, whereas a thin one-inch board will flex and bounce under moderate loading.
Understanding allowable static versus dynamic load limits ensures safe everyday usage. Static loads represent stationary decorative objects: vases, framed art prints, and stationary ceramics. Dynamic loads occur when a user pulls down on a cookbook, leans an elbow against the shelf edge, or places a stack of heavy ironstone plates onto the surface with momentum. Engineering your floating shelf system to withstand a minimum safety factor of three times the anticipated working load guarantees that sudden everyday impacts will never compromise the structural integrity of the wall.
Wall Framing Anatomy: Studs, Fasteners, and Why Drywall Anchors Fail
The single most dangerous mistake committed during DIY floating shelf installations is relying on drywall anchors, molly bolts, or butterfly toggle anchors. Marketing packaging on commercial toggle bolts frequently advertises astonishing weight capacities of seventy-five or one hundred pounds. However, these ratings apply strictly to pure vertical shear loads hanging flush against the wall: such as flat picture frames or mirror wire. Under the aggressive rotational pullout leverage generated by a deep cantilever shelf, hollow drywall anchors will crack the brittle gypsum core, tear through the paper backing, and catastrophically pull free under barely twenty pounds of cantilevered weight.
Every floating shelf must be mechanically fastened directly into the solid vertical wooden framing studs concealed behind your drywall. In standard North American residential construction, wall framing consists of two-by-four or two-by-six dimensional timber studs spaced sixteen inches apart on center (or twenty-four inches on center in some non-load-bearing partitions). Each vertical stud provides one-and-a-half inches of solid lumber width into which structural fasteners can bite with immense holding power.
Locating wall studs with pinpoint precision requires a multi-layered investigative approach rather than relying blindly on a cheap electronic sensor. Electronic stud finders detect changes in wall density, but they can be easily fooled by electrical conduit, plumbing pipes, or variations in drywall mud texture. Combine electronic scanning with rare-earth neodymium magnetic stud locators. Neodymium magnets snap firmly to the steel drywall screws driven into the studs during drywall installation. By finding three vertical drywall screw heads in a straight plumb line, you verify the exact center axis of the wooden stud with mathematical certainty.
Exploratory confirmation drilling eliminates guesswork before mounting heavy hardware. Once you have magnetically identified the presumed stud centerline, chuck a tiny one-sixteenth-inch drill bit into your drill. Drill a small exploratory test hole through the drywall at your planned shelf height. If the bit hits solid resistance after penetrating the half-inch drywall skin and produces clean wooden shavings, you have struck solid lumber. If the bit punches effortlessly into empty wall cavity space, adjust your horizontal position left or right by half an inch until solid timber resistance is confirmed.
Fastener engineering dictates the pullout strength of the bracket connection. Never use brittle black drywall screws or generic gold construction screws; drywall screws possess high hardness but near-zero shear ductility, meaning their heads will snap off cleanly when subjected to rotational bending forces. Instead, utilize heavy-duty structural wood screws (such as GRK RSS Rugged Structural Screws or Simpson Strong-Tie SDWS screws) measuring at least one-quarter inch in diameter by three to three-and-a-half inches in length. Structural screws feature heat-treated hardened steel alloys, aggressive deep-milled threads, and integrated washer heads that clamp the steel bracket plate flush against the framing with over eight hundred pounds of ultimate pullout resistance per screw.
Concealed Blind Shelf Hardware: Precision Solid Steel Bracket Architecture
The mechanical heart of a professional floating shelf is the concealed blind shelf bracket. While vintage woodworking tutorials often recommend crafting wooden internal ladders from two-by-twos and skinning them with plywood, these hollow box assemblies look dated, require complex edge banding, and lack the sheer load-bearing stiffness of solid hardwood slabs mounted over heavy steel armature.
Precision-welded solid steel bracket systems represent the pinnacle of modern floating shelf hardware. These commercial-grade brackets consist of a continuous cold-rolled steel backplate: typically measuring one-and-a-half inches in vertical height by one-quarter to three-eighths of an inch in thickness: onto which solid round steel rods are welded perpendicularly at factory-calibrated intervals. The steel rods generally measure one-half inch to three-quarters of an inch in diameter and extend six to eight inches horizontally from the backplate.
The structural advantage of a continuous steel backplate over individual standalone mounting pins cannot be overstated. A continuous backplate spans multiple wall studs, allowing you to secure the bracket into two, three, or four separate framing studs simultaneously. This unified steel spine distributes rotational bending forces evenly across the entire wall framing structure, eliminating localized stress concentrations on a single stud. Furthermore, factory-welded rod assemblies ensure that all mounting rods are held in exact parallel alignment, preventing binding when sliding the solid hardwood shelf into place.
Individual heavy-duty threaded steel rod systems provide an adaptable alternative when custom shelf lengths or non-standard stud spacings prevent using pre-welded backplates. In this system, heavy three-quarter-inch solid steel rod brackets featuring integral threaded mounting studs are driven directly into the center of individual framing studs. High-end variations incorporate eccentric adjustment pins or micro-leveling collars that allow you to rotate the rod slightly after installation, correcting minor leveling errors or compensating for studs that are out of plumb.
Routing a rear perimeter recess into the wooden shelf blank allows the backplate to sit completely flush against the drywall. If a solid wood slab is simply drilled and slid over a bracket with a surface-mounted backplate, a noticeable one-quarter-inch gap will remain between the back of the shelf and the wall. By using a plunge router equipped with a straight carbide bit and edge guide, you rout a shallow pocket into the back edge of the timber slab matching the exact dimensions of the steel backplate. When pushed into position, the wood wraps seamlessly over the steel plate, meeting the wall in a flawless, gap-free hairline joint.
Precision Woodworking: Deep Boring and Mortising the Shelf Core
Transforming a raw hardwood slab into a floating shelf requires executing deep, perfectly straight internal bore holes that receive the steel bracket rods. Drilling a hole that is seven inches deep while maintaining absolute ninety-degree perpendicularity across both the horizontal and vertical axes is an unforgiving task. A wandering drill bit tilted by even two degrees off-axis will emerge crooked, causing the shelf to tilt downward or binding so severely against the steel rods that the shelf cannot be seated onto the wall.
Tooling selection is vital for boring deep, clean holes into dense hardwoods. Standard twist drill bits lack the length and chip-ejection capability required for seven-inch bores. Spade bits are prone to aggressive chatter, wander off-center, and leave rough, torn grain walls. The premier tooling for this operation is an extra-long brad-point bit or a high-performance WoodOwl Ultra Smooth auger bit. Brad-point and auger bits feature sharp outlining spurs that slice wood fibers cleanly before removing the core, combined with precision center spurs that track dead-straight through tough growth rings without drifting.
Boring jigs ensure mathematical alignment between the steel hardware and the wooden shelf core. For woodworkers without access to an industrial horizontal mortising machine or floor-standing drill press with adequate spindle travel, crafting a dedicated hardwood guide block or utilizing a commercial doweling jig is essential. A commercial drilling guide (such as the Rockler Blind Shelf Drilling Jig or Milescraft DrillBlock) clamps rigidly across the back edge of the wood slab, guiding the long drill bit through precision hardened-steel bushings that enforce dead-square ninety-degree entry.
Bore diameter tolerances must provide sufficient clearance for smooth sliding without introducing sloppy mechanical play. If your steel bracket rods measure one-half inch (0.500 inches) in diameter, drilling a half-inch hole will result in a zero-tolerance interference fit: minor wood friction or slight microscopic rod deflection will cause the shelf to jam halfway on. Drilling the hole one-sixteenth of an inch larger (nine-sixteenths of an inch, or 0.5625 inches) provides the ideal working clearance, allowing the shelf to slide home smoothly while maintaining firm, wobble-free horizontal engagement.
Chip clearance choreography during drilling prevents overheating and bit wander. When boring seven inches deep into dense white oak or walnut, wood shavings quickly pack tightly inside the flute flutes, creating intense friction that can burn the timber and scorch the bit’s cutting edge. Practice continuous peck drilling: advance the drill bit one-half inch into the wood, pull the bit completely out of the hole while spinning to fling chips clear, blow out the bore with compressed air, and advance another half inch. This disciplined cycle keeps the cutting edges cool and preserves laser-straight trajectory.
Step-by-Step Installation Masterclass: Wall Marking to Final Lock-Down
With your hardwood shelf precision-bored, rear-routed, and sanded, the execution transitions from the woodshop to the residential interior. Installing floating shelves with professional speed and structural confidence requires following a disciplined, sequential workflow that eliminates cumulative measurement errors.
Phase one begins with layout height mapping and laser leveling. Determine the desired installation elevation based on ergonomics and visual sightlines: thirty-six inches for kitchen prep shelves, fifty-four to sixty inches for eye-level display shelves, or eighteen inches above a desk surface. Rather than relying on a small spirit level that can introduce subtle tilt across a six-foot span, mount a self-leveling cross-line laser level on a tripod. Project a bright horizontal reference datum line across the target wall. This sharp laser line serves as your absolute horizontal benchmark across all layout steps.
Phase two involves locating stud centerlines and marking hardware anchor slots. Using your neodymium magnet locator, pinpoint the exact centers of all wall studs intersecting your laser line. Hold the steel bracket backplate against the wall, aligning its top reference edge with the laser beam. Use a fine-point drafting pencil or center punch to transfer the stud centers through the bracket’s elongated mounting slots onto the drywall. Elongated mounting slots allow micro-adjustment during screw tightening to ensure flawless horizontal alignment.
Phase three requires drilling pilot holes directly into the center of the wooden studs. Never drive large structural screws into solid framing without pre-drilling; driving a quarter-inch screw into a dry framing stud without a pilot hole will either crack the stud along its grain or snap the screw shaft under intense friction torque. Chuck a drill bit sized to the root diameter of the screw threads (typically three-sixteenths of an inch for a quarter-inch screw) and wrap a piece of blue painter tape around the bit at a depth of two-and-a-half inches. Drill clean pilot holes straight through the drywall and into the framing studs.
Phase four entails driving structural fasteners and verifying zero-sag bracket geometry. Position the steel backplate against the wall and drive your structural washer-head screws through the bracket slots into the studs using an impact driver. Do not overtighten the screws initially; tighten them until they seat firmly, verify horizontal level with a precision machined torpedo level resting across the bracket rods, and apply final torque. Inspect the rods with a small magnetic level: high-quality commercial brackets incorporate a deliberate upward angle of one to two degrees (positive camber). This microscopic upward tilt counteracts the weight of the hardwood shelf and future contents, settling into a dead-flat ninety-degree horizontal plane once fully loaded.
Phase five covers dry-fitting the shelf and installing bottom set-screws. Slide the hardwood shelf blank smoothly over the protruding steel rods until the routed rear recess envelops the backplate flush against the drywall surface. Check the front lip with a digital level to confirm perfect levelness. To prevent the shelf from creeping forward over time due to vibration or accidental bumping, drill two tiny pilot holes up through the underside of the shelf near the back edge directly into the steel rods, driving small brass or black set-screws into pre-drilled dimples in the steel armature to lock the timber permanently in place.
Surface Sanding, Grain Raising, and Finishing Systems
The visual and tactile allure of handcrafted floating shelves depends upon the quality of the wood finishing system. A flawless finish highlights the natural beauty, chatoyancy, and figure of the timber while protecting against grease spatters in kitchens, steam moisture in bathrooms, and ultraviolet degradation from sunlight.
Surface preparation demands a rigorous progressive sanding grit schedule. Never skip grits in an attempt to save time; coarse scratches left by aggressive grits will become glaringly visible once stain or oil is applied. Begin with an 80-grit abrasive on a random orbital sander to flatten any planer mill marks or minor surface variations. Vacuum the wood dust thoroughly and progress sequentially to 120-grit, 150-grit, and finally 180-grit abrasives. Sanding hardwood beyond 180 or 220 grit before applying penetrating oils is counterproductive, as it polishes and closes the wood pores, preventing the finish from penetrating deeply into the grain.
Popping the grain (grain raising) separates amateur wood finishes from professional museum-grade surfaces. When water-based stains or finishes contact dry wood, the severed end-grain fibers absorb moisture, swelling and standing upright like whiskers, leaving the surface rough and gritty. After sanding to 180 grit, wipe down the entire wood surface with a clean microfiber cloth dampened with warm distilled water. Allow the wood to dry completely for thirty minutes: you will feel the raised fuzzy fibers across the surface. Gently hand-sand the surface with fresh 220-grit paper on a firm cork block to slice off these whiskers without cutting through the wood layer. When the final finish is applied, the surface will remain glass-smooth.
Finishing chemistries must be chosen based on environmental exposure and maintenance preferences. For living rooms, bedrooms, and home offices, modern hardwax oils (such as Rubio Monocoat Oil Plus 2C or Osmo Polyx-Oil) represent the premier standard. Formulated from refined natural plant oils (linseed, sunflower, and soybean) and micro-fine waxes (carnauba and candelilla), hardwax oils molecularly bond with the cellulose fibers of the wood in a single application. They deliver a luxurious, ultra-matte natural tactile finish with zero plastic film buildup, zero toxic volatile organic compounds (VOCs), and exceptional water and wine stain resistance.
For high-moisture environments: such as floating shelves installed in kitchen cooktop zones or master bathroom walk-in shower vestibules: a film-forming commercial finish provides maximum protection. Water-based polyurethanes (such as General Finishes High Performance Topcoat) or conversion varnishes create an impenetrable protective barrier against liquid water, cooking oil splatters, and steam. Apply three light coats with a high-density foam brush, lightly hand-scuffing between coats with 320-grit abrasive pads to ensure flawless inter-coat adhesion and a satin luster.
Specialized Wall Substrates: Tile Backsplashes, Plaster, and Masonry
While standard drywall over timber studs represents the most common residential installation substrate, contemporary interior designs frequently demand mounting floating shelves across challenging architectural surfaces: ceramic tile backsplashes, historic lath-and-plaster, and solid brick or concrete masonry.
Mounting floating shelves over glazed ceramic or porcelain tile backsplashes requires specialized drilling techniques to prevent cracking expensive tile work. Standard masonry or twist bits will instantly dull and skate wildly across glazed porcelain, chipping the surface. Instead, utilize diamond-grit hole saws or specialized spear-point carbide tile bits. Mark the mounting hole locations onto strips of blue painter tape applied directly over the tile face. Lubricate the diamond bit continuously with cool water from a spray bottle, running the drill at moderate speeds without hammer action until the bit cores cleanly through the tile and adhesive mortar bed. Once the timber framing stud behind is reached, switch to a standard wood drill bit to complete the pilot hole.
Historic lath-and-plaster walls present distinct structural considerations in older homes. Plaster walls feature horizontal wooden laths covered by three-eighths to one-half inch of lime or gypsum scratch and brown coats, topped by a brittle skim finish. Vibrations from hammering or driving screws without pilot holes can cause brittle plaster keys to break off behind the laths, cracking large sections of the wall. Always pre-drill plaster using masonry bits until the wood lath is reached, and secure structural screws deeply into the main timber studs rather than relying on the thin lath strips.
Brick, concrete, and cinder-block masonry walls provide exceptional compressive anchoring substrate when paired with the proper expansion hardware. To mount a floating shelf bracket directly to solid brick or poured concrete, drill holes using an SDS-Plus rotary hammer drill equipped with a premium four-cutter carbide bit. Vacuum all brick dust from the hole using a narrow tube attached to a HEPA vacuum. Secure the steel bracket using heavy-duty masonry sleeve anchors, concrete wedge anchors, or high-tensile Tapcon large-diameter concrete screws. When properly torqued into solid masonry, these anchors provide immense pullout strengths exceeding one thousand pounds.
Curated Shelf Styling: Weight Distribution and Interior Vignettes
Once your handcrafted floating shelves are securely anchored and cured, styling the open shelving elevates the installation from an exercise in woodworking to a captivating interior design masterpiece. Open shelving must balance practical storage utility with artistic negative space to prevent visual clutter.
Architectural weight distribution principles must always guide object placement. Although professional steel armature supports significant loads, common sense dictates placing the heaviest items: such as thick ceramic mixing bowls, Dutch ovens, stacks of ironstone dinner plates, or large stone planters: close to the internal support rods and near the back edge of the shelf against the wall. Placing dense weight near the wall reduces the cantilever lever arm, minimizing stress on the hardware and preserving structural alignment for the lifetime of the home.
The interior design rule of thirds creates harmonious, dynamic vignette compositions. Avoid aligning objects in monotonous, symmetrical rows like grocery store displays. Instead, create asymmetrical triangular groupings combining items of varied heights, textures, and geometric forms. Pair a tall matte ceramic vase on the left with a medium-height stack of horizontal linen-bound art books in the center, accented by a small sculptural brass object or trailing succulent on the right. This height variation leads the viewer’s eye smoothly across the shelf span.
Negative space represents a deliberate, powerful design element. Resist the urge to pack every inch of shelf surface with decorative knick-knacks. Leaving twenty-five to thirty-five percent of the shelf deck completely open creates visual breathing room, allowing the natural grain of the timber and the architectural beauty of individual curated objects to stand out. Integrating cascading trailing plants: such as golden pothos, string of pearls, or English ivy: softens straight horizontal lines and introduces vibrant biophilic color into the room.
Floating Shelf Hardware Systems: Architectural Performance Comparison
Selecting the appropriate concealed mounting hardware is the single most critical engineering decision when planning a floating shelf installation. Hardware designs vary significantly in weight capacity, deflection resistance, adjustment flexibility, and installation complexity. Understanding these performance trade-offs ensures that you specify the ideal hardware system for your shelf dimensions and anticipated loading requirements.
Whether you are hanging a lightweight picture ledge in a nursery or mounting heavy solid maple shelves holding cast iron cookware in an open-concept kitchen, matching your hardware to the specific wall substrate and cantilever depth prevents costly wall repairs and sagging shelves.
The comparative matrix below evaluates the structural load capacities, recommended shelf depths, leveling adjustment mechanisms, and best-use scenarios for the six primary floating shelf mounting systems available to woodworkers and homeowners today.
| Mounting System Architecture | Weight Capacity per Stud | Max Recommended Depth | Micro-Leveling Mechanism | Installation Complexity | Ideal Application Zone |
|---|---|---|---|---|---|
| Continuous Steel Backplate + Welded Rods | 50 – 75 lbs per stud | 10″ – 14″ inches | Slotted stud holes + positive camber | Intermediate (Router recess + deep boring) | Heavy kitchenware, book collections, thick hardwood |
| Heavy-Duty Threaded Rod Brackets | 40 – 55 lbs per rod | 9″ – 12″ inches | Eccentric cam rotation pins | Intermediate to Advanced (Stud center boring) | Custom lengths, irregular stud spacing, fireplace mantels |
| Internal Wooden 2×4 Ladder Cleats | 30 – 45 lbs per stud | 8″ – 12″ inches | Manual shimming behind wall cleat | Beginner (Carpentry box skinning) | Budget DIY hollow-core box shelves, painted finishes |
| Concealed T-Bracket Surface Pins | 20 – 30 lbs per pin | 6″ – 8″ inches | None (fixed vertical screw tabs) | Beginner to Intermediate | Bathroom cosmetics, nursery ledges, decorative vases |
| Heavy-Duty Wall Cleat (French Cleat) | 60 – 80 lbs per stud | 6″ – 10″ inches (requires bottom skirt) | Leveling cleat during wall mounting | Intermediate (Mitered 45-degree joinery) | Chunky box shelves, credenzas, thick floating nightstands |
| Drywall Hollow Toggle Anchors | 5 – 10 lbs total (Unsafe) | Under 5″ inches | None (High risk of drywall failure) | Beginner (Not Recommended) | Strictly lightweight picture frames (Never heavy shelves) |
Reviewing this comparative analysis reinforces the indispensable necessity of anchoring directly into wall framing studs using heavy welded steel backplate hardware. By eliminating reliance on drywall friction and utilizing precision solid steel armature, your floating shelves achieve structural permanence and timeless aesthetic refinement.
Frequently Asked Questions About Floating Wooden Shelves
How much weight can a solid wood floating shelf realistically hold?
When mounted directly into two or more wooden wall studs using heavy-duty pre-welded solid steel rod brackets, a well-engineered floating shelf can safely support between forty-five and seventy-five pounds per stud connection. A four-foot shelf anchored into three studs can comfortably hold one hundred and fifty to two hundred pounds of distributed weight: easily supporting heavy ceramic tableware, stoneware, and art book collections.
Can I install floating shelves without hitting wall studs?
No, you should never attempt to mount a load-bearing floating shelf without anchoring directly into wall studs. Because floating shelves act as mechanical cantilevers, even moderate weight placed at the front edge exerts extreme rotational pullout force on the fasteners. Drywall anchors, plastic sleeves, and toggle bolts will crack the brittle gypsum core and rip free under cantilever leverage, causing catastrophic failure.
What is the minimum thickness required for a solid wood floating shelf?
A solid hardwood floating shelf requires a minimum vertical thickness of one-and-three-quarters inches (1.75 inches), with two to two-and-a-half inches being the ideal standard. This thickness is necessary to accommodate a seven-inch-deep internal bore hole for a half-inch or five-eighths-inch steel mounting rod while leaving sufficient solid wood above and below the hole to prevent the timber from splitting under load.
What is positive camber in floating shelf brackets and why is it important?
Positive camber is a deliberate upward angle of one to two degrees engineered into professional steel mounting rods. When you first install the bracket, the rods angle microscopically upward toward the ceiling. When the heavy solid hardwood slab is slid onto the rods and loaded with everyday items, the natural deflection of the steel settles into a perfectly flat, dead-level ninety-degree horizontal plane.
How deep can a floating wooden shelf be without sagging?
For residential installations, the recommended shelf depth is between eight and twelve inches. While ten inches is the sweet spot for kitchenware and books, twelve inches accommodates large dinner plates. If you need a shelf deeper than twelve inches, you must use extra-long steel rods (eight to ten inches) manufactured from heavy three-quarter-inch cold-rolled steel and ensure anchoring into at least three framing studs to overcome rotational leverage.
How do I drill a seven-inch-deep hole straight into the back of a shelf?
Drilling a long, dead-straight hole requires using a specialized WoodOwl auger bit or extra-long brad-point bit paired with a rigid drill guide jig. Never attempt to freehand drill a seven-inch bore with a handheld drill. A commercial doweling jig or hardwood guide block clamped to the shelf back enforces a strict ninety-degree entry angle, while frequent peck-drilling clears chips and prevents drill wander.
Which wood species is best for handcrafted floating shelves?
Kiln-dried American white oak, black walnut, and hard sugar maple represent the premier hardwood species for floating shelves. They offer high Janka hardness ratings, dense grain structures, and exceptional dimensional stability when acclimatized to indoor residential humidity. For rustic aesthetics, kiln-dried quartersawn Douglas fir offers high strength at a lighter physical weight.
How do I stop a floating shelf from sliding forward off its steel rods?
To prevent forward creep, professional installers use concealed set-screws. Once the shelf is pushed fully against the wall, drill two small pilot holes on the underside of the shelf near the back edge directly into the steel rods. Driving short black or brass set-screws up through the wood into pre-drilled indents in the rods mechanically locks the shelf in position, preventing movement while remaining completely invisible from standing height.
What is the best protective finish for kitchen and bathroom floating shelves?
For kitchen and bathroom shelves exposed to grease, steam, and liquid moisture, water-based polyurethane topcoats or conversion varnishes provide an impermeable waterproof barrier. For living areas, dining rooms, and bedrooms, two-component hardwax oils (such as Rubio Monocoat or Osmo Polyx-Oil) deliver a luxurious ultra-matte natural wood texture with exceptional stain resistance and simple spot repairability.
How do I mount floating shelves across a tiled kitchen backsplash?
Mounting over tile requires coring through the tile without cracking it using a diamond-grit hole saw lubricated continuously with water. Once the tile and mortar bed are cored through to reveal the drywall and framing stud behind, switch to a standard wood drill bit to drill the stud pilot hole. Tightening structural screws with washer heads directly against the steel bracket distributes clamping force without stressing the surrounding tile edges.
Design Verdict and Long-Term Structural Excellence
Handcrafting and installing floating wooden shelves is one of the most rewarding joinery projects you can undertake for your home. By harmonizing organic lumber grain with rigorous cantilever engineering, you transform dead vertical wall space into an enduring architectural focal point that enriches daily living.
Approach the project with craftsmanship discipline: choose stable, kiln-dried hardwoods with vertical grain, bore deep rod channels using precision drilling jigs, and anchor heavy-duty steel backplates directly into the structural center of wall studs using hardened washer-head screws. Finish your timber with natural hardwax oils to preserve organic grain warmth, and style the finished shelves with balanced negative space and thoughtful weight distribution.
When engineered correctly, a floating wooden shelf is not merely a piece of storage furniture; it is an heirloom architectural element that stands dead-level and rock-solid, bringing organic elegance and functional craftsmanship into your home for generations to come.